Showing posts with label spray-paint. Show all posts

Friday, September 30, 2011

Navy navy navy (beans?)

Guess what? It is another post about my house. Lucky you?

Last Christmas we got an awesome TV and since then it has been hanging out on a Lifetime folding table... which isn't so awesome. I knew what I wanted for a TV stand - a dresser with the top drawer removed and a shelf in its place. Nothing too specific right? Ha. But I am cheap and lazy so I never got around to finding what I wanted at a price I was willing to pay. But luckily I have awesome friends who, when they found out my TV stand dreams, sold me the dresser they don't really use.

It went from this:


To this:

I could have left it cream but it wasn't the prettiest against my yellowish-cream walls and I really was itching for something navy. So navy it became!

I wish I could have kept the original hardware as it was pretty and ornate but one of the handles was broken so I had to replace them all. Luckily brushed silver looks great against navy.

My hot husband installing the shelf.

It was a lot of fun to work on this project with my husband - he made the shelf, drilled holes in the back (so cords could be plugged in), and fixed problems with the drawers. I'm so so so happy to have a real TV stand!

The view from my couch. Awww... perfect! Well, except for the husband's backpack in my shot... :)

Sunday, September 18, 2011

Speaking of Chairs...

I realized after posting my freecycle chairs that I never shared pictures of my kitchen chairs on this blog. I have a matching set of four, two of which are cream and slightly boring (one pictured below), but the two that I painted last summer are pistachio green and are awesome.

I promise there is a 4th chair, but I keep it in my sewing room.

I sure love color. And having chairs to sit on whilst eating my dinner and/or using my computer. Life is good. :)

Also, I promise my kitchen/dining area isn't as boring as it looks in this picture (I have two whole wall hangings... so it is slightly less boring than it looks). I guess my decorating style could be defined as: functional + simple + color + cheap (but not necessarily in that order). Plus, I can't be bothered with staging photos to make things look cuter than they appear.

Tuesday, September 6, 2011

I totally labored on Labor Day

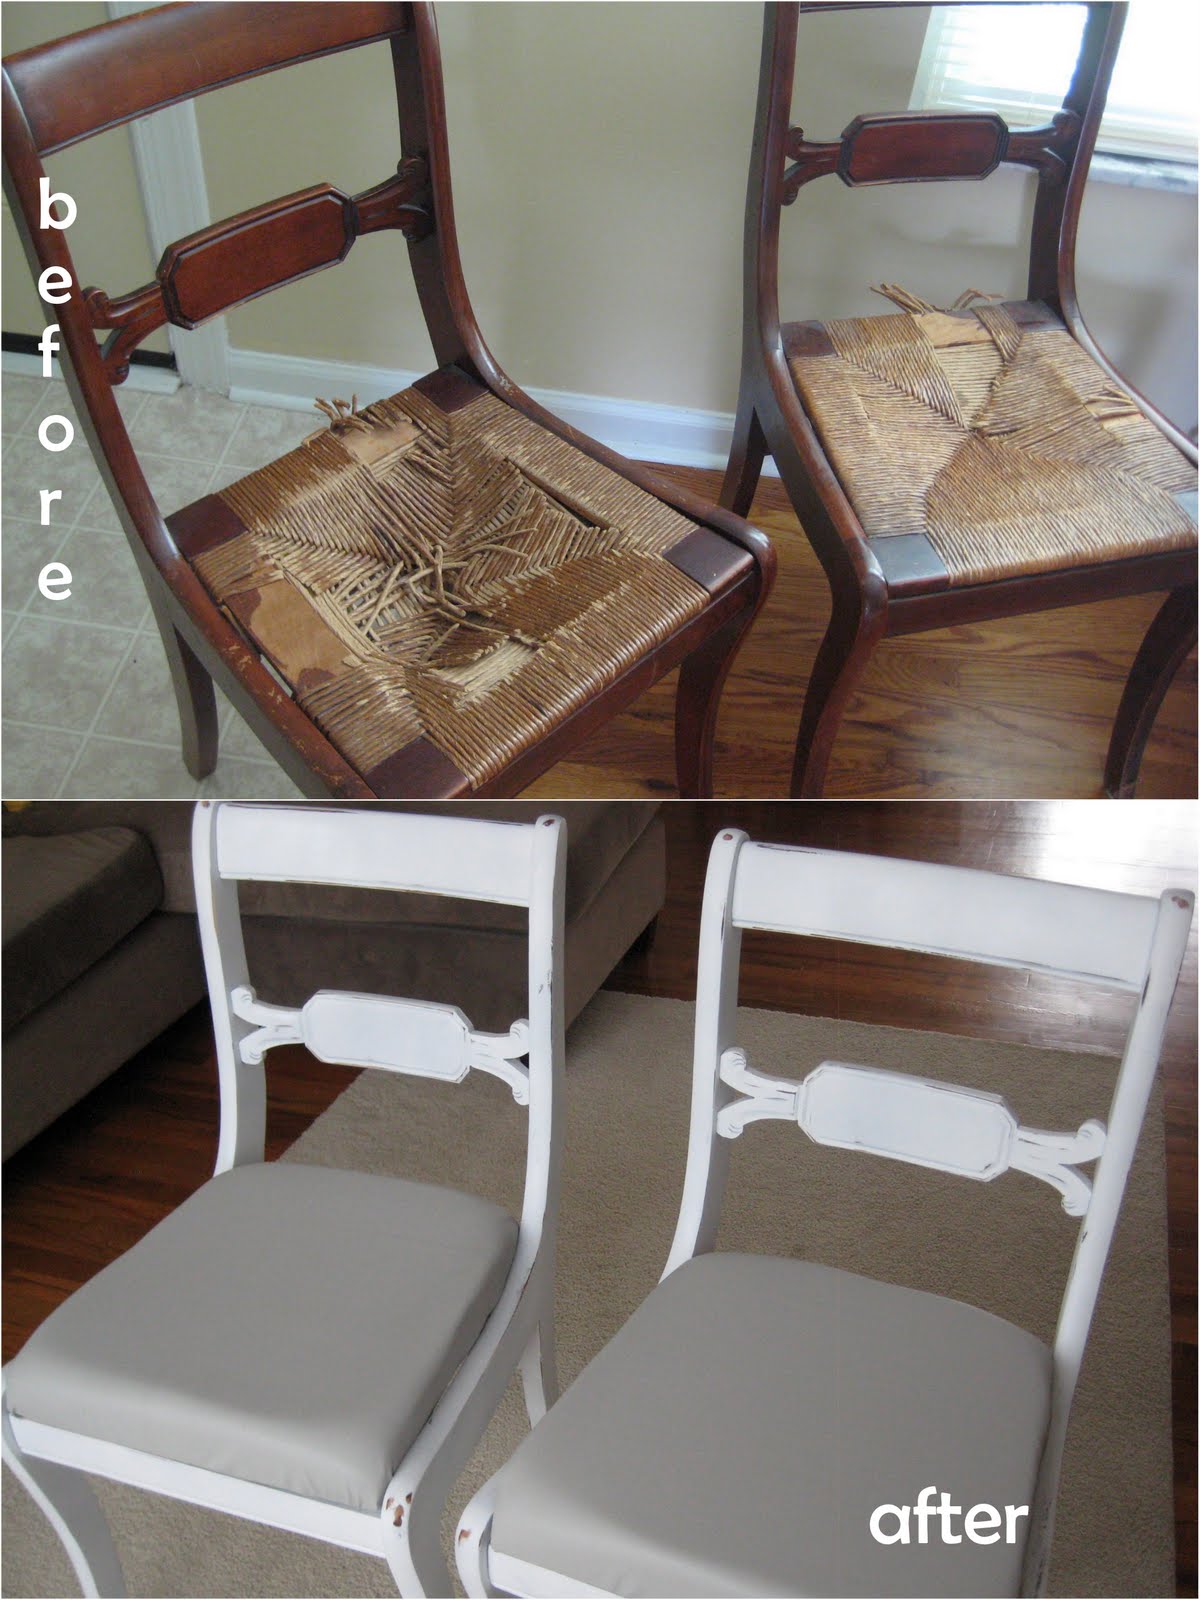
Wanna see what I finally finished? These awesome chairs. Last summer we got them from freecycle but the seats were busted. I wasn't in a rush to finish them but didn't realize it would take me basically a year to actually work on them. But I totally finished them and I feel awesome about it.


First, I got those nasty broken seats off. Then painted the frames white and distressed them a little. I don't know why I always feel the need to distress painted wood, but I do. It might be because I don't like some things in pristine condition. Plus, it helps draw out details that would otherwise be masked by paint. And these chairs have some lovely details.

Some of the distressed details

Once the frames were to my liking, we (mostly meaning my husband) went and got some 3/8 inch thick plywood and had them cut down to size. Then I got my high-density foam (40% off coupons are the best as high-density foam is not the cheapest) and cut it down to size (I used my serrated bread knife - worked like a charm).


Then I used my super soft, light-gray pleather remnant I found at Joann's to cover my newly-made seats. My sweet husband stapled the fabric down and will eventually screw those seats down for me (so I guess they technically aren't finished but they are still functional so they still count as done... to me... ). And now I have beautiful and comfy new chairs that were relatively cheap!


Cost breakdown:

  • chair frames: $0
  • paint (cheap-o spraypaint): $8
  • clear topcoat: $3
  • plywood: $4
  • high-density foam: $8
  • pleather remnant: $4
Total cost for 2 chairs:  $27

Wednesday, August 18, 2010

The Power of Spray-Paint

I love spray-paint. It can transfer something cheap and ugly into cute and updated. Here are a few before and afters of some of my recent spray-paint projects.

Napkin holder ($1)
It wasn't so much ugly before but that blue sure didn't match my kitchen decor. But now that it is black it is oh so perfect! 

Mail organizer ($.50)
We were in desperate need of something to organize our mail and this was just the right price. The problem: it was a very, very dated brown. Problem is now fixed (I might even mod podge some cute paper on it later).
 
Lamp bases ($2/each)
I love the shape of these lamp bases. Now that they look just how I want them too I need to get some cute lamp shades made. 

I guess I really like black spray-paint. Good thing it goes with basically everything! :)

Thursday, July 22, 2010

Mirror/Key Holder Thingy


This is the first "craft" project I have finished for our new place and I looove the way it turned out. Plus, my husband helped so it was a lot of fun, too.


In our many thrift store visits this past week, I found this framed mirror for less than $2. The instant I saw it I knew what I would do with it (my husband had mentioned in passing that he would like a place to hang our keys).

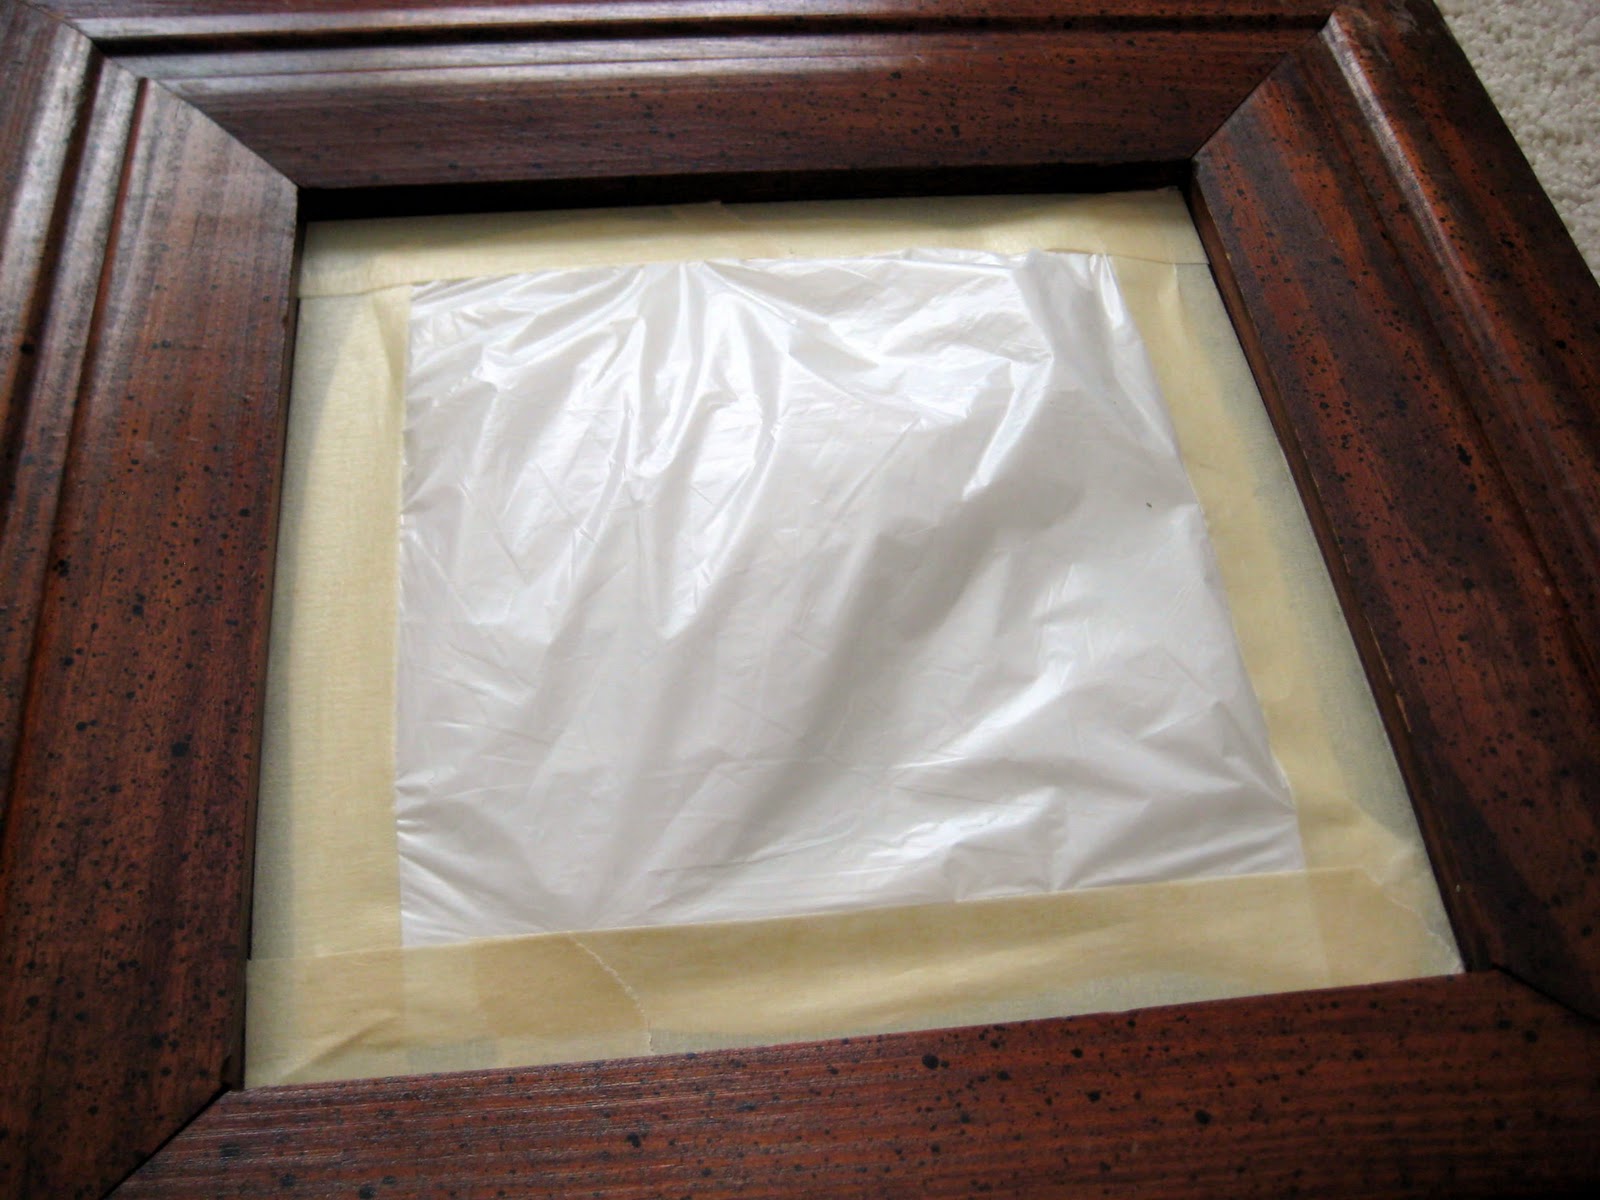
After forking over the <$2, we took it home. I cleaned up the wood and taped up the mirror with a cut up grocery bag and masking tape.


I spray painted it white (it took a few coats). After it dried overnight, I took some sandpaper and went to town. At first I was worried that I was a little too sandpaper happy but in the end I didn't care and just had fun with it. :)


Once that was done, I marked (with a pencil) where I wanted my hooks.

My husband pulled out his drill and bits and made some pilot holes to screw in my hooks. (My husband compared the length of the screw to the hook and placed masking tape on the bit at that point to prevent the drill from drilling too deep. Does that make sense? Let me know if you have questions.)


We screwed in the hooks, took off the tape and plastic, cleaned the mirror, and ta dum: we have a cute and handy dandy key holder. I hung ours by the front door (a convenient spot if I do say so myself).


And now you know how to make one, too! Hooray!

Oh, and because I can't resist sharing... Here is a "sneaky" pic I got of my husband going up the stairs. I hate to see him go but love to see him walk away. ;)

Tuesday, February 23, 2010

Clementine's Crate

This project has been mostly done for the better part of a month and I finally got around to finishing it and taking pictures...

I LOVE clementines and how plentiful they are during the winter. Yum, yum, yum. We always get them whenever they are on sale and in December some of my clementines came in this cute little wooden crate.


For some reason I couldn't throw it out. I kept it around and one day decided to spray-paint it, add some distressing, and put it to use.


It is now in my bedroom holding my makeup and a flat-iron. Yay for recycling!

Wednesday, December 30, 2009

Embroidered Monogram

Every now and then I like doing an embroidery project. I've done a monogram before and I love the way it turned out. I thought I'd give it another go for my sister-in-law's birthday present. I believe this stitch is called the satin stitch. I know it isn't perfect but I still liked the way it turned out.


I'm also pretty proud of this frame. It was one I already had on hand and just spray-painted black. I've never really done much with spray-paint before but I think I could very easily become addicted... I'm already thinking of the different things that could use a shiny coat of black paint.

Linking up with Blue Cricket Design's Show and Tell 

LinkWithin

Related Posts Plugin for WordPress, Blogger...